RSS

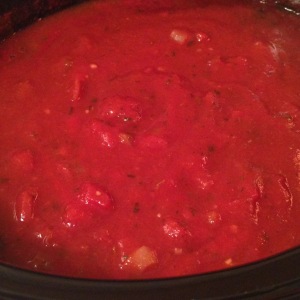
Slow Cooker Spaghetti Marinara Sauce

I can’t say this enough, but the slow cooker is the best kitchen invention ever! It makes cooking so much easier. This marinara sauce is a family recipe from my in-laws. Just throw all the ingredients in the slow cooker. Set it on Low for 8 hours. This is a now healthy dinner staple for my own family.

INGREDIENTS:

  • 4 small cans of tomato paste
  • 2 regular cans of Muir Glen organic diced tomatoes
  • 4 cups water
  • 6 cloves minced garlic
  • 1/2 chopped onion
  • 1 tbsp. basil
  • 1 tbsp. Italian Seasoning
  • 1tbsp. sugar
  • salt and pepper

spaghetti

 
Leave a comment

Posted by on July 16, 2015 in Slow Cooker


Tags: , ,

Lego Birthday

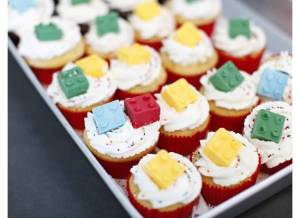
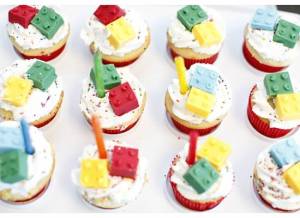
Lego Cupcake ToppersThis is long over-due! Life happened. Now I’m ready to get back into my blog.

Last Spring, our son turned 5. He was really into Lego building. He started with the kits and then branched out with his imagination with his own Lego creations. It was an easy theme to go with for his birthday party. The party location was at ASI Gymnastics. (They have friendly, energetic party hosts who do a great job of providing a fun and interactive party for kiddos.)

For his birthday cake, I baked white cupcakes (using a box of mix), topped with Wilton’s buttercream frosting. For the Lego brick toppers, I used a Lego Brick silicone mold from Etsy.com, melted a bag of color Wilton’s Candy Melts in the microwave on 50% power at 30 second intervals until smooth, and filled the molds with the melted candy. I cut off the corner of the bag, squeezed the melts into the mold tray, and tapped the tray to get rid of air bubbles. After the Lego melts hardened in the refrigerator for at least 30 minutes, I carefully cut the candy block in half, so it wouldn’t be too big for little kids to eat. The candy Lego bricks were perfect as edible cupcake toppers. The kids loved them!

lego cupcake

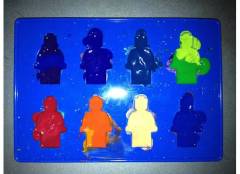
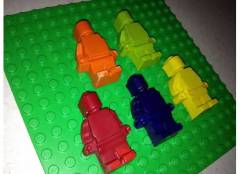
 For the party favors, I made crayons in the shape of Lego Minifigures. The Lego Minifigure silicone mold was purchased from Etsy.com. I peeled and broke Crayola brand crayons in small pieces. It takes about 1 crayon of broken pieces to fill 1 Minifigure mold. I set the mold tray on a cookie sheet, melted them in the oven at 225F degrees for 10-12 minutes, or until the crayons melted.

 Lego Minifigure MoldLego Minifigure Crayons

Although it took some time to make these, I enjoyed doing this for our birthday boy!

 
Leave a comment

Posted by on February 12, 2013 in Birthdays, Cakes, Crafts


Tags: , , ,

Slow Cooker Chicken Taco Soup


This chicken taco soup is so easy yet hearty. Just throw all the ingredients in a slow cooker in the morning before heading out the door for work, and let it cook for you all-day. Serve this topped with shredded cheddar cheese, a dollop of sour cream, and crushed tortilla chips, if you like.

Prep time: 15 minutes
Cook time: 8-10 hours
Yield: 8-10

Ingredients

  • 1/2 chopped onion
  • 1 (16 oz) can chili beans
  • 1 (15 oz) can black beans, drained
  • 1 (8 oz) can whole kernel corn, drained
  • 1 (8 oz) can tomato sauce
  • 2 cans chicken broth
  • 2 (10 oz) cans Rotel or diced tomatoes with green chilies, undrained
  • 4 tablespoons taco seasoning
  • 4 whole skinless, boneless chicken breasts
  • shredded cheddar or Mexican blend cheese (optional)
  • fat free sour cream (optional topping)
  • crushed tortilla chips (optional)

Cooking Directions

  1. Place the chopped onion, chili beans, black beans, corn, tomato sauce, chicken broth, and diced tomatoes in a slow cooker. Add taco seasoning, and stir to blend.
  2. Lay chicken breasts on top of the mixture, pressing down slightly until just covered by the other ingredients.
  3. Set slow cooker for Low Heat, cover, and cook for 5 hours.
  4. Remove chicken breasts from the soup, and shred them using 2 forks. Stir the shredded chicken back into the soup, and continue cooking for 2 hours.
  5. Serve topped with cheddar cheese, a dollop of sour cream, and crushed tortilla chips, if desired.
 

Tags: , , ,

Thin Mint Brownie Bites

For the fun of St. Patrick’s Day, I made these simple brownie treats with a touch of green, thanks to the recipe idea from The Traveling Spoon. These incorporate Thin Mints, my favorite Girl Scout Cookies! Brownie bites are easier to serve than the traditional brownies, with no utensils or clean-up needed. Just pop them into your mouth!

INGREDIENTS:

  • 1 Box of brownie mix of your choice (I used Duncan Hines Fudge Brownies)
  • 1 sleeve of Thin Mints (crushed)
  • 1 stick of unsalted butter (softened)
  • 2 cups of powdered sugar
  • 1.5 – 2 tablespoons of milk
  • 1/2 teaspoon of peppermint extract
  • 4 drops of green food coloring

DIRECTIONS:

For the brownie batter: Follow the directions on the box, and stir in crushed Thin Mints. Place mini paper liners into 2 mini muffin pans. No greasing needed. (I used 1 mini and 1 regular pan because that is all I had on-hand). Pour 1 tablespoon of brownie batter into each liner.

For the green marble-like icing: Stir together all these ingredients. Icing should be a little bit thick and not runny. Place a little dollop of icing on top of each brownie batter, and then swirl it with a knife to create a marble-like effect.

Bake in a preheated oven at 325F for about 14-17 minutes. Watch the brownies towards the end to make sure they don’t overflow. Cool brownies in pan for about 20 minutes. Put the extra icing in an icing bag or Ziploc bag with the corner tip cut-off, and decorate a green touch on top of the brownie. Enjoy the luck of the Irish!

 
Leave a comment

Posted by on March 17, 2012 in Desserts, Holiday Food Fun


Tags: , , , , ,

Yo Gabba Gabba Birthday

Yo Gabba Gabba was the party theme for our daughter’s 3rd birthday. She loves watching, singing, and dancing with the Gabba Gang, especially Muno, Brobee, and Foofa and their music bands The Aquabats and Jimmy Eat World. In order to keep costs minimal without breaking the bank, I relied on my “go-to” party supply stores – Dollar Tree and Wal-Mart. It was her first “all-out” birthday party with theme and games for little ones. Our daughter was super-excited seeing her party come alive with her favorite YGG characters and bright, bold colors.

For the food, we kept it simple and toddler-friendly (sandwich triangles, pigs in a blanket, fruit/veggie trays, critter crunch, and Muno Pretzel Sticks. For the pretzel sticks, I bought 2 packages of red candy melts from Michael’s, which was enough to melt and dip about 70 pretzel sticks. After dipping each pretzel stick, I sprinkled red candy sprinkles and placed a fondant “Muno eye” on it. The fondant eyes were made by my sister who acquired her fondant skills from a recent cake decorating class.

My husband and I created several activity games for the little ones. The 1st activity was a table for the kids to color YGG sheets. The 2nd activity was “Party In Brobee’s Tummy” Food Toss. My husband took a big box that we had laying around in our garage, sketched out the outlines of Brobee, spray painted it lime green, and used red, black, and true green acrylic paint for the smaller sections. For the food toss, I used plastic foods from our kids’ play kitchen.  The 3rd activity was “Pin The Eye On Muno”. I found a printable for this game on www.gabbafriends.com, so it was simple to print on an 11×14 paper, and glue it to a foam core board.

In our garage, we set-up a photo area for our party guests. The photo background was simply a blue bedsheet that we already had, with colorful streamers taped on it, and white Christmas lights strung across it. We had a basket of Yo Gabba Gabba props for guests to wear that our kids already owned (Muno guitar, DJ Lance Rock wig, etc).

The last activity was a balloon-popping game. Each child was given a balloon pre-filled with paper confetti. I played the “Happy Birthday” track by the Ting-Tings from the Yo Gabba Gabba’s “Music is Awesome!, Vol. 2” CD. The object of the game was for each child to keep their balloon in the air throughout the song. When their balloon landed on the floor, I popped it with a nail, confetti flying around them. At the end of the song, the last kids with the their balloons still kept up in the air WINS!

Saving the best for last, the party’s “icing on the cake” was literally our daughter’s birthday cake. My sister created a marshmallow-fodant Yo Gabba Gabba 3-tired cake. Not only did the cake look awesome, it tasted sooo good!

 
Leave a comment

Posted by on March 6, 2012 in Birthdays, Cakes, Crafts


Tags: , , , , , , , , ,

Paula Deen’s Red Velvet Cupcakes

This recipe is Paula Deen’s Red Velvet Cupcakes with Cream Cheese Frosting. I frosted them using Wilton’s 1M Decorating Tip. I also made the cupcake toppers for these, making it themed for an “Olivia The Pig” Birthday.

 
Leave a comment

Posted by on March 6, 2012 in Birthdays, Cakes


Tags: , , ,

Spongebob Squarepants Birthday Cake


Our son’s birthday is coming up next month, so I asked him what kind of birthday cake would he like this time. Last year, he wanted Spongebob Squarepants. Because of the childhood memories that I have of my mom making birthday cakes for me and my siblings, I want to carry-on that same tradition with my own children. I’m very amateur with my decorating skills and still have a lot to learn, but for the Spongebob Cake last year, I scoured the Internet for simple homemade inspiration, and decided on a 13×9 rectangle cake decorated as Spongebob Squarepant’s head. I requested the decorating assistance of my husband, the artist. With any of my cooking and baking, if there is a simpler way to go about doing it, I will do it!  Instead of baking a cake from scratch, I like to use a box cake mix and add in a few optional ingredients. Top it with homemade frosting, and it makes it all taste like something from a professional bakery!

For Gage’s Spongebob cake, I used white cake mix topped with homemade Buttercream Frosting from Wilton’s website. I added drops of food coloring to create the needed colors (yellow, red, blue), bought a can of Duncan Hines chocolate frosting for the brown color, and a tube of Wilton’s Black Decorating Icing for the outlines. I just have a basic Wilton Cake Decorating Set that included Disposable Decorating Bags, Quick-Change Tip Couplers, and Decorating Tips 3 and 104, which my husband used to decorate the cake. It was his 1st time decorating any cake, but with an artistic eye and a steady hand, he did an amazing job!

This year, I’m going with the LEGO them. Our son is loving LEGOs alot more lately, and it seems like it will be an easy idea to run with. Photos to come later!

 
2 Comments

Posted by on February 25, 2012 in Birthdays, Cakes, Crafts


Tags: , , , ,

Image

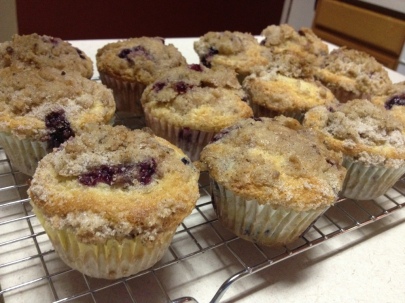
Lola’s Blueberry Muffins

Mom and Gage (Sea World, April 2008)

I love how food can bring you back to special time in life. This recipe reminds me of my dear Mom – my role model and our family rock. She unexpectedly passed away in April 2009 from a verry aggressive form of Stage 4B non-smoker lung cancer, just three months after our daughter was born and one month after our son turned 2. But the recent memories that I most cherish about my Mom were the precious times that she spent caring for our son Gage during his first few years, while I was at work. My Mom had her full-time job as an ICU Nurse, but on her off-days, she would babysit Gage. He called her “Lola”, meaning “Grandmother” in the Filipino language. They would simply hang out at the house, read books together, watch cartoons, draw/color together, and he would help my Mom water the plants in their backyard. Also, my Mom would often bake muffins for him, including banana chocolate chip muffins and blueberry muffins, both made with applesauce. Last Winter, I was going through my Mom’s recipe collection, and came across the original Blueberry Muffin recipe that she made for Gage. What confirmed that it was the same recipe was his scribbling all over the recipe paper! I envisioned what probably happened in her kitchen while she was babysitting Gage – he sitting in his high chair scribbling on her recipe papers, while my Mom entertained him and whipped together these muffins, all at the same time! I now have one of numerous wonderful memories left behind of my Mom to carry on with my own kids. I continue to share stories of times spent with her, including how much she loved baking for him and his cousin Phoenix when they were both little toddlers. Now, my own children easily get going in the early morning, knowing that they get to have these yummy muffins for their breakfast!

20120222-121601.jpg

BLUEBERRY MUFFINS WITH STREUSSEL TOPPING RECIPE

Servings: 12 regular-sized muffins (or 24 mini-sized muffins)

MUFFIN INGREDIENTS:

1 ½ cups all-purpose flour
¾ cup white sugar
½ teaspoon salt
2 teaspoons baking powder
1/3 cup applesauce
1 egg
1/3 cup milk
1 cup fresh blueberries

STREUSEL TOPPING INGREDIENTS (Optional):

½ cup white sugar
1/3 cup all-purpose flour
¼ cup unsalted butter, cubed
1 ½ teaspoons ground cinnamon

DIRECTIONS:

Preheat oven to 400 degrees F. Grease muffin cups or line with muffin liners.

Combine 1½ cups flour, ¾ cup sugar, salt and baking powder. Place applesauce into a 1 cup measuring cup; add the egg and enough milk to fill the cup. Mix this with flour mixture. Fold in blueberries. Fill muffin cups. Sprinkle with crumb topping mixture.

TO MAKE STREUSEL TOPPING (Optional): Slightly melt the cubed butter in the microwave for 15-20 sec. Mix together ½ cup sugar, 1/3 cup flour, ¼ cup cubed unsalted butter, and 1½ teaspoons cinnamon. You can cut throught the small cubes of butter and dry ingredients with a mixer or the blades of butter knives until coated. Sprinkle over muffins before baking.

Bake for 18-23 minutes in the preheated oven, or until done. (These muffins will be generously-sized muffins.)

 
Leave a comment

Posted by on February 22, 2012 in Breakfast


Tags: , , , ,

Valentine Cookie Bouquet

My husband and I’s wedding anniversary is on Valentine’s Day. This year, we agreed to do something different with our gift-giving. Instead of buying each other gifts, we created something special for each other. I’m so glad we did because it made our anniversary so much more special! My husband’s favorite cookie is my Valentine Sugar Cookies with Icing. So, I decided to bake these cookies and turn them into something more by making a Cookie Bouquet. It was my first time creating it, and I was happy with the way it turned out. I bought a pack of 20 lollipop sticks found in the party supplies/baking section of Wal-Mart for a couple of dollars, and got a pack of 25 clear plastic favor bags with twist-ties from Michael’s using my 40% off coupon. The sticks are oven-safe, too. I just simply pressed the stick on the bottom half of the heart-shaped cookie dough cut-outs, and wah-la! The bottom of the vase was filled with 100+ pieces of folded paper of “Reasons Why I Love You”. Next time I make one of these cookie bouquets, I’ll put something heavy like glass pebbles inside the bottom of the vase to weigh the it down.

 
Leave a comment

Posted by on February 19, 2012 in Crafts, Desserts


Valentine Sugar Cookies with Icing

My sister introduced me to this Williams-Sonoma recipe several years ago. Ever since then, I’ve made these cookies as a tradition every Valentine’s Day season. They have become my husband’s favorite cookies!

VALENTINE SUGAR COOKIES:

When working with differently shaped cookie cutters, make sure that the cookies on each cookie sheet are the same shape to ensure even baking.

Ingredients

  • 2 1/2 cups all-purpose flour
  • 1 1/2 tsp. baking powder
  • 1/2 tsp. salt
  • 8 Tbs. (1 stick) unsalted butter
  • 8 Tbs. (1 stick) margarine
  • 1 1/4 cups sugar
  • 2 eggs
  • 1 tsp. vanilla extract
  • 2 tsp. grated lemon zest
  • Frosting, decorative icings and sugars

Directions:

Have all the ingredients at room temperature.
In a large bowl, sift together the flour, baking powder and salt; set aside.
In the bowl of an electric mixer fitted with the flat beater, beat together the butter, margarine and sugar on medium speed until light and fluffy, 3 to 4 minutes, occasionally scraping down the sides of the bowl. Add the eggs one at a time, beating well and scraping down the sides of the bowl after each addition. Add the vanilla and lemon zest and beat until just blended. Reduce the speed to low and add the flour mixture in three additions, beating each addition until just blended.
Turn the dough out onto a lightly floured surface and shape into a ball. Divide the dough in half and shape each half into a disk. Wrap the disks separately in plastic wrap and refrigerate for at least 1 hour or as long as overnight.
Preheat an oven to 350ºF.
Generously flour 2 cookie sheets and roll out the dough directly onto the sheets to 1/4-inch thickness. Using lightly floured cookie cutters, cut out cookies. Carefully gather the dough from around the cutouts and set aside to roll out again.
Bake the cookies until the edges are just golden and the centers are just firm to the touch, 12 to 15 minutes. Using a thin metal spatula, immediately loosen the cookies and let them set for 3 to 5 minutes, then carefully transfer them to a wire rack and let cool completely. When the cookie sheets have cooled, roll out the remaining dough onto the sheets, cut out cookies and bake.
Decorate the cookies with frosting, icings and sugars. Store in an airtight container for up to 7 days. Makes 20 to 24 cookies.

SUGAR COOKIE ICING:

This icing dries hard and shiny and the colors stay bright. Choose as many different food colorings as you desire.

INGREDIENTS:

1 cup confectioner’s sugar
3 teaspoons milk
3 teaspoons light corn syrup
1/4 teaspoon almond extract
assorted food coloring

DIRECTIONS:

In a small bowl, stir together confectioner’s sugar and milk until smooth. Beat in corn syrup and almond extract until icing is smooth and glossy. If icing is too thick, add a tiny bit more of corn syrup and/or milk to get the desired consistency, if needed. Divide icing into seperate bowls, and add food colorings to each to desired intensity. Put the icing onto the cookies with a frosting spatula or spoon. Sprinkle crystal sugars onto them, if desired. It takes several hours for the icing to dry.

 
Leave a comment

Posted by on February 18, 2012 in Desserts


Tags: , ,